
How to Map Your First Business Process for Automation: A Step-by-Step Guide for UK SMEs
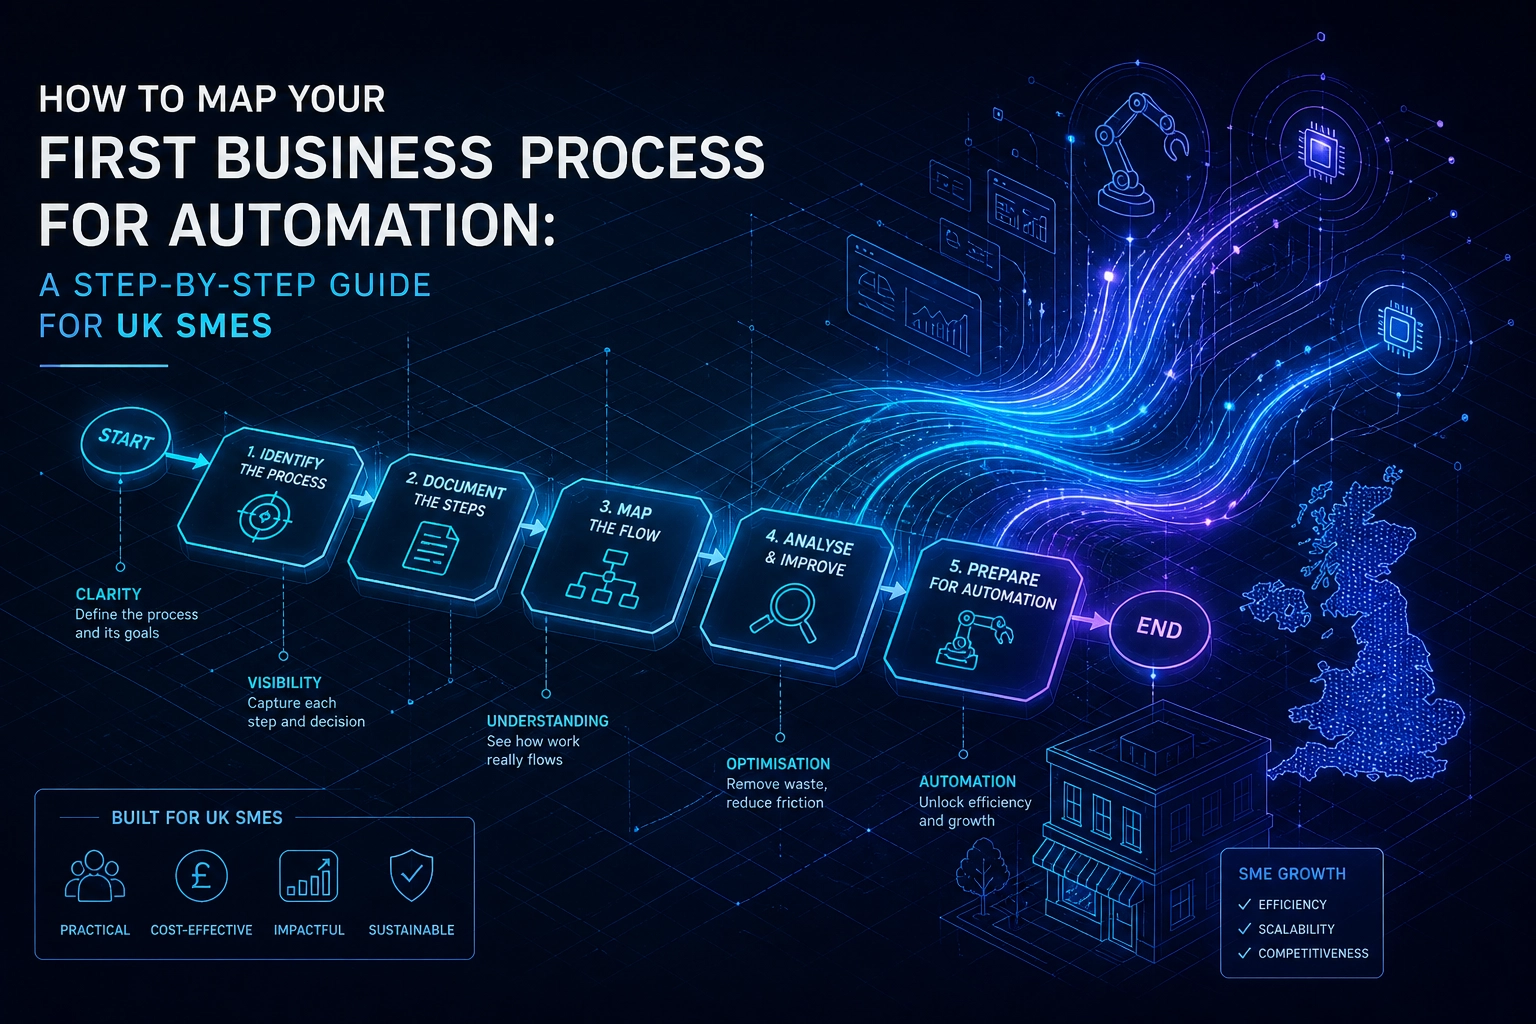
Most automation projects do not fail because of the technology. They fail because nobody properly documented the process before the software was switched on. If you have ever invested in a new tool only to find it created more confusion than it solved, this is almost certainly what went wrong.
Automation in business process improvement only delivers real results when you know exactly what you are automating and why. Yet for most UK SMEs, where two or three people carry the entire operational load, processes live in people's heads rather than on paper. That invisibility is expensive.
This guide gives you a practical, repeatable method to fix that, and you can complete it in a single afternoon. You will learn how to choose the right process to map first, gather the information you need, draw a clear current-state picture, identify which tasks are genuinely ready for automation, and produce a concise brief you can hand directly to a consultant or vendor.
No prior experience is required. By the end, you will have a document that most businesses never create, and the one that makes everything else significantly easier.
Why Process Mapping Must Come Before Automation Tools
Most automation projects do not fail because the technology breaks down. They fail because no one wrote down the process before the build began.
When a business hands a consultant a verbal description of how something works, that consultant is forced to design automation around assumptions. Inefficiencies get encoded into the workflow rather than removed from it. The result is a faster version of a broken process, not a better one. If you want to reduce errors and improve consistency, the starting point is always a written, verified record of what is actually happening today.
UK SMEs face a structural disadvantage here that larger organisations do not. In a business run by two or three people, operational knowledge rarely exists anywhere other than in those individuals' heads. There is no process manual, no handover document, and no formal workflow record. Every step of how an invoice gets raised, a lead gets followed up, or a new client gets onboarded exists as accumulated habit rather than documented procedure. That is entirely normal, and it is also the single biggest obstacle to successful automation.
The consequence is not just an automation risk. It is an operational one. Without a written map, there is no reliable way to identify which parts of a workflow are working and which are wasting time. Bottlenecks stay invisible. Redundant steps persist because no one has ever seen the whole sequence laid out from start to finish.
Completing a process map before approaching any vendor changes your position entirely. You arrive with documented evidence of how the process runs, where the time goes, and what the trigger points are. That evidence gives you an objective basis for evaluating automation tools, interrogating quotes, and measuring whether the delivered solution is actually performing after go-live. Without it, you are evaluating tools against a feeling rather than a fact.
The good news is that this does not require specialist software, a data analyst, or a week of preparation. A focused mapping exercise, done properly, can be completed in a single afternoon.
What Process Mapping Actually Means for an SME
So what does process mapping actually involve in practice?
At its simplest, process mapping is the act of visually documenting every step, decision, and handoff within a specific business task, from the trigger that starts it to the moment it is complete. It is not a theoretical exercise. It produces a diagram that makes visible what is currently invisible: the sequence of actions, the points where decisions branch, and the handoffs between people or systems that keep a task moving.
This is not reserved for large enterprises. Modern diagramming tools have made professional-grade process mapping accessible to any business, and a focused session on a single process can realistically be completed in an afternoon. The investment is time and attention, not specialist software or consultancy fees.
Two formats are worth knowing at SME scale:
Flowcharts suit simple, sequential tasks performed by one person or role, where the process moves in a mostly straight line from start to finish.
Swimlane diagrams suit tasks that cross roles or departments. Each horizontal lane represents a role or system, making it immediately clear who is responsible for what and where handoffs occur. For most SMEs, swimlane diagrams are the more useful default because very few real processes stay within a single person's remit.
A process map is only as useful as the detail it captures. The four data points that matter for any automation of business process decision are: what the step is, who performs it, how long it takes, and what triggers the next step. Omit any of these and the map cannot support meaningful automation planning.
The final point is perhaps the most important framing shift for anyone completing this exercise for the first time. The output is a working document, not a polished presentation. Its value lies in what it exposes: bottlenecks where work stalls, redundant steps that exist through habit rather than necessity, and tasks that are strong candidates for automation. To see what a well-structured operational build looks like when that groundwork has been done properly, what the platform delivers illustrates the kind of clarity that follows disciplined process documentation.
With that definition established, the next question is which process to map first.
Step 1: Choose the Right Process to Map First
Once you have a clear picture of what process mapping involves, the next decision is the one most SME owners get wrong: choosing which process to map first.
The instinct is usually to start with whatever feels most painful this week. That instinct produces poor results. A more reliable method is to score your candidate processes against three criteria before picking one.
The Three-Column Prioritisation Grid
Create a simple table with your candidate processes listed in the first column. Score each one from 1 to 3 across three dimensions:
Frequency: How often does this process run? Daily scores 3; weekly scores 2; monthly scores 1.
Pain level: How much time, error, or frustration does it generate? High scores 3; moderate scores 2; low scores 1.
Rule clarity: How consistently does it follow the same logic each time? Almost always the same scores 3; occasional exceptions scores 2; highly variable scores 1.
Add the three scores. The process with the highest total is your starting point, regardless of which one feels most urgent. This matters because urgency and automation-readiness are not the same thing. An automation workflow built on a process that is variable and exception-heavy will create more problems than it solves.
What Makes a Process Automation-Ready
The best first candidates are repetitive, rule-based, and high-frequency. Invoice processing, lead follow-up, customer onboarding, and appointment scheduling consistently score well across all three dimensions for UK SMEs.
Avoid starting with anything that requires genuine judgement, creative decision-making, or frequent one-off exceptions. Automation workflow design depends on predictable inputs and consistent outputs. If the process changes shape every third time it runs, it is not ready.
Common Entry Points by Sector
If you want a sector-specific shortcut:
Accountancy firms: client onboarding packs and engagement letter sequences
E-commerce businesses: order confirmation workflows and returns handling
Service businesses: quote-to-invoice sequences
Agencies: lead intake and new client briefing workflows
Each of these shares the same profile: high frequency, clear rules, measurable output. If you are unsure where to begin, you can also review how I work to understand the kinds of processes that translate most directly into scoped automation solutions.
With your target process selected, the next step is gathering the right people and information before a single step gets drawn.
Step 2: Gather the People and Information You Need
Once you have identified your target process, resist the temptation to sit down and draw it from memory. Process maps built from recall alone are almost always incomplete. The person who runs a task every day stops consciously noticing the micro-steps they perform automatically: checking a secondary inbox before responding, cross-referencing a spreadsheet to verify a detail, or sending an informal Slack message to get an informal approval. Those invisible steps are precisely where automation gaps hide.
Identify people first. For the process you have chosen, name the primary owner, the person who performs it most frequently. Then list every secondary touchpoint: anyone who receives its output, approves a step within it, or acts on its result. In a typical SME, this list is short, but every person on it holds process knowledge the primary owner may not document without prompting.
Gather the artefacts the process already produces. Email templates, spreadsheets, CRM records, form submissions, and invoices each reveal steps that informal descriptions miss. A worked example of how a business captures from form submission to complete documentation illustrates how many discrete steps sit between a simple trigger and a finished output. Collect every document, template, and system the process touches before you speak to anyone.
Run a structured interview with the process owner. Keep it to four questions:
What triggers this process to start?
What do you do first?
What can go wrong, and what do you do when it does?
What does a successful completion look like?
These four questions consistently surface exception-handling steps and informal workarounds that would otherwise stay hidden until after automation is built.
Flag compliance dependencies before anything else. If the process touches customer data, note the relevant UK GDPR obligations under the Data Protection Act 2018. If it involves invoicing or financial records, identify any Making Tax Digital or VAT record-keeping requirements. Payroll-adjacent processes carry their own regulatory constraints. These obligations must be built into the automation design from the start, not retrofitted after the workflow is already live.
Step 3: Draw the Current-State Map
With your notes and artefacts gathered from Step 2, you are ready to put the first version of your map on paper.
Start with a blank swimlane diagram. Create one horizontal lane for each role or system involved in the process: "Sales," "Finance," "CRM," "Email", not "Jenny in Sales" or "Bob's spreadsheet." Organising lanes by function rather than individual means the map stays accurate when staff change, which in a small business happens more often than most owners expect.
Map what actually happens, not what should happen. This is the single most important discipline in the entire exercise. Every informal workaround, every shortcut, every approval that happens via WhatsApp rather than a formal sign-off system must appear on the map. If it does not, the automation will be built on a fictional version of the workflow, and it will break against reality the first week it runs. Ask yourself honestly: "Is this what we do, or what we tell ourselves we do?"
Use a consistent, minimal symbol set. The standard flowchart conventions keep the diagram readable by anyone:
Rectangles for tasks and actions
Diamonds for decision points, with yes/no branches leaving each corner
Arrows to show flow direction
Circles for start and end points
Stick to these four. Introducing additional shapes at this stage adds visual noise without analytical value.
Annotate every task box with three data points: who performs the task, roughly how long it takes, and which tool or system is used (email, spreadsheet, phone call, CRM). These annotations are what transform a diagram into a working analysis tool, and they feed directly into the ROI calculation in Step 5.
Use free tools and keep moving. Lucidchart, draw.io, and a shared Google Slides template are all entirely sufficient. The goal is a clear, accurate record of reality, not a boardroom-ready graphic. Over-engineering the diagram is one of the most common time traps in this exercise. If you are spending more than ninety minutes on formatting, stop and refocus on content.
You can see how this practical, process-first approach shapes the way we work with clients before any automation tool is selected.
Step 4: Identify Automation-Ready Tasks Within Your Map
With your current-state map drawn, the next task is forensic rather than creative: you are looking at each step and asking whether a machine could handle it reliably, every time, without human oversight.
Not every step qualifies, and that is by design. Tasks involving genuine judgement, emotional intelligence, or regulatory discretion should stay human-led. A rule of thumb: if two experienced staff members might handle the same situation differently depending on context, it is not yet automation-ready.
The Automation-Readiness Checklist
Run each task in your map through four questions:
Is the trigger consistent and identifiable? Does something specific and predictable always start this task?
Is the logic rule-based with fewer than three decision branches? Can you write the decision as a simple if/then statement?
Is the input data structured and digital? Does the task receive data in a consistent, machine-readable format?
Is the output always the same format? Does the task always produce the same type of result?
Four "yes" answers indicate strong automation potential. A single "no" does not automatically disqualify a task, but it flags a dependency that needs resolving before any automation workflow can be scoped reliably.
Common Automation Targets in SME Workflows
Tasks that consistently pass this checklist in typical SME operations include: data entry between disconnected systems, notification and reminder sending, document generation from templates, client or team status updates, and report compilation from multiple sources. These are high-frequency, low-judgement activities where manual effort is hardest to justify.
Quantify the Time Cost Now
For every automation-ready task, record the manual time per occurrence and multiply by monthly frequency. A task taking 8 minutes that runs 60 times per month represents 8 hours of avoidable labour. This monthly hours figure is the foundation of your ROI calculation and a critical input into any automation workflow brief you take to a consultant.
Document the Technical Dependencies
For each qualifying task, note the source system, the data format it produces, and the destination system. This specificity transforms your brief from a vague wishlist into a document a consultant can scope and price on first review.
Step 5: Calculate Your Time Savings and Build the Automation Brief
With your automation-ready task list complete, the final step converts raw time data into a business case and produces a document any competent consultant can act on immediately.
Calculate Your Baseline Cost
Apply this formula to each automation-ready task identified in Step 4:
(Minutes per occurrence × monthly frequency) ÷ 60 = monthly hours spent
Multiply the result by the hourly cost of the person performing that task. A task taking 15 minutes, performed 80 times per month, by someone costing £25 per hour, represents 20 monthly hours and £500 in labour. That figure is your baseline. Any automation investment should be evaluated against it.
Group Tasks Into a Single Scope
Resist the temptation to brief one task at a time. Grouped automations share infrastructure, reduce integration complexity, and deliver substantially better ROI than isolated single-task builds. Take every automation-ready task from Step 4, calculate the combined monthly cost, and present them as one unified scope.
The Six-Element Automation Brief
A consultant-ready brief contains exactly these elements:
A plain-English description of the current process
The swimlane diagram from Step 3
The automation-ready task list, with time-per-occurrence and monthly frequency for each item
All tools and systems currently in use
Any compliance or data-handling constraints flagged in Step 2, including GDPR or Making Tax Digital obligations
The outcome you are trying to achieve
That last element carries the most weight. Frame it in business terms, not technical ones. Not "automate the CRM update" but "eliminate 6 hours of weekly manual data entry so the sales team can focus on outbound calls." This framing gives a consultant everything needed to scope accurately and price with confidence. The same principle applies beyond sales workflows; if you want to automate your hiring workflow, for instance, the outcome framing would focus on time-to-hire and recruiter hours saved, not the mechanics of the applicant tracking system.
Use the Brief to Evaluate Vendors
This document is also a filter. Present it to any prospective consultant before engaging further. A qualified partner will respond with a clear methodology, a realistic timeline, and an itemised cost estimate. Vague responses or scope-free proposals are a reliable signal to keep looking.
What This Looks Like in Practice: Three SME Examples
To see how this plays out in practice, here are three anonymised SME examples. Each owner completed their process map before engaging any consultant, and in each case the map changed what they thought they needed.
Professional services firm, lead intake
A six-step sequence covering form submission, email acknowledgement, CRM entry, qualification call booking, document send, and follow-up reminder was mapped in under two hours. The exercise revealed that four of the six steps were fully automatable using tools the business already had in place. Estimated saving: 8 hours per week across the team. Without the map, the owner had planned to automate only the follow-up reminder, capturing a fraction of the available value.
E-commerce retailer, returns handling
Swimlane mapping across customer service, warehouse, and finance lanes exposed three redundant manual notification steps, each duplicating information the other lanes had already recorded. More significantly, the map surfaced a compliance gap: refund records were not being stored in a format that satisfied VAT record-keeping requirements. Both issues were resolved before any automation was scoped, avoiding the risk of embedding a regulatory problem directly into an automated workflow.
Trades business, quote-to-invoice sequence
The mapping exercise showed that the business owner was personally performing 11 of the 14 steps in the workflow. Several of those steps were entirely rule-based: generating a PDF quote from fixed-rate data, sending a standard confirmation, updating a job status field. The map quantified more than 5 hours of weekly bottleneck time concentrated in a single role. That figure, visible only once the steps were laid out, made the case for automation far more clearly than any instinct could.
In all three cases, the automation scope that emerged from the mapping exercise was broader and more valuable than what the owner had initially intended to brief. The map is what made that visible.
These are precisely the types of automation workflow improvements that CRM integrations and multi-step workflow tools can address, once a clear process map and brief are in place to define the scope accurately.
Common Mistakes UK SMEs Make When Mapping for Automation
Those three examples illustrate what good mapping produces. They also reveal, by contrast, the errors that prevent most first attempts from reaching the same outcome.
Mapping the ideal process instead of the real one is the most damaging mistake. A map that shows how a process should work omits every workaround, informal approval, and compensating manual step that staff actually perform. Automation built on that version will fail the moment it encounters reality. The map must capture what happens today, not what the procedure manual says should happen.
Scoping too broadly on the first attempt is the second most common failure. SME owners frequently try to document the entire business before completing one process end-to-end. The result is a diagram too complex to act on and a brief too vague for any consultant to quote against with confidence. One process, fully mapped, produces more actionable output than ten processes mapped superficially.
Skipping the time-quantification step removes the only objective basis for approving the investment. Without actual minutes-per-occurrence and monthly frequency data, there is no baseline against which to measure whether the delivered automation is working. Every automation workflow decision should be traceable back to a number, not a feeling that something takes too long.
Ignoring compliance touchpoints at the mapping stage creates expensive rework later. UK SMEs subject to Making Tax Digital obligations, GDPR data-handling requirements, or sector-specific regulation need to flag those constraints during mapping, not during build. If a step in the process touches personal data or a VAT-reportable transaction, that must appear on the map before any automation is scoped. Retrofitting compliance into a live automation is significantly more costly than designing for it from the start.
Treating the map as a one-time deliverable is the subtlest error. A process map created once and filed away loses accuracy the moment a role changes, a system is replaced, or the business adds a new service line. The most operationally mature SMEs treat process documentation as a living asset, reviewed at each of those trigger points rather than only when something breaks.
Your Next Steps After Completing the Map
Avoid the mistakes in the previous section and you arrive at this guide's core deliverable: three concrete documents you can hold in your hand before speaking to a single supplier.
The five steps produce a current-state swimlane diagram, an automation-ready task list with ROI data, and a structured brief that any competent automation consultant can quote against on first contact. That combination shifts the entire commercial dynamic in your favour. You define the scope. You set the evaluation criteria. You establish the timeline. Vendors respond to your specification rather than selling you theirs, which is the single most reliable way to avoid over-engineered or poorly scoped solutions.
That control matters most when the brief surfaces opportunities across CRM workflows, lead management, client communication, or multi-system integrations. These are the areas where vague conversations with suppliers tend to produce expensive, misaligned builds. A specialist with the right technical depth can take a well-formed brief and move directly to a scoped, costed proposal, with no drawn-out discovery phase required. If you would like to see what that progression looks like in practice, this overview of moving from initial idea to a finished automation brief illustrates the journey clearly.
At Automation by Meir, that is precisely how we work. Clients who arrive with a completed process map and a structured brief receive a scoped, priced solution faster and with significantly less back-and-forth than those who start without one.
The investment required is a single afternoon. No specialist software. No prior methodology experience. The map you produce today is the highest-leverage action available to you before committing to any automation tools or engaging any supplier.
Conclusion
Process mapping is not a preliminary formality. It is the foundational work that determines whether your automation investment succeeds or stalls.
You have now seen why selecting the right process matters, how to document it accurately, where automation opportunities hide within the detail, and how a structured brief transforms your conversations with suppliers.
The businesses that achieve the strongest results from automation share one common trait: they understood their own processes before they touched a single tool.
Your map costs nothing but time. It protects your budget, sharpens your brief, and puts you in control of every decision that follows.
Start with one process this week. Document what actually happens, not what should happen. Identify the repetitive tasks. Calculate the time at stake. That single afternoon of focused work could define the direction of your business operations for years ahead.